Welcome to Part 2 of the Realm Object Server and remote logging tutorial.
First thing we’ll see is how you can export the awesome Realm DB with all your saved messages you have created and read the contents on your Mac.
Before going any further, if you haven’t done that already, download the Realm Studio app from here.
After you have installed Realm Studio, the next thing in line is to find the db file you have created. If you are running the app on a real device, this is very easy. Just connect the device to you Mac, open XCode, go to Devices and download the App Container installed on your test device. After opening the container you can find the Realm file under the folder named ‘Documents’.
If you are running on the simulator, you will have to locate the simulator files on your hard drive. The easiest way to do that is, while debugging your app, hit a breakpoint and then type on the Terminal in XCode the following command. “po Realm().configuration”.
This will print a lot of information about the Realm instance running. The interesting part in our case is the “fileURL”. Use that to locate your file.
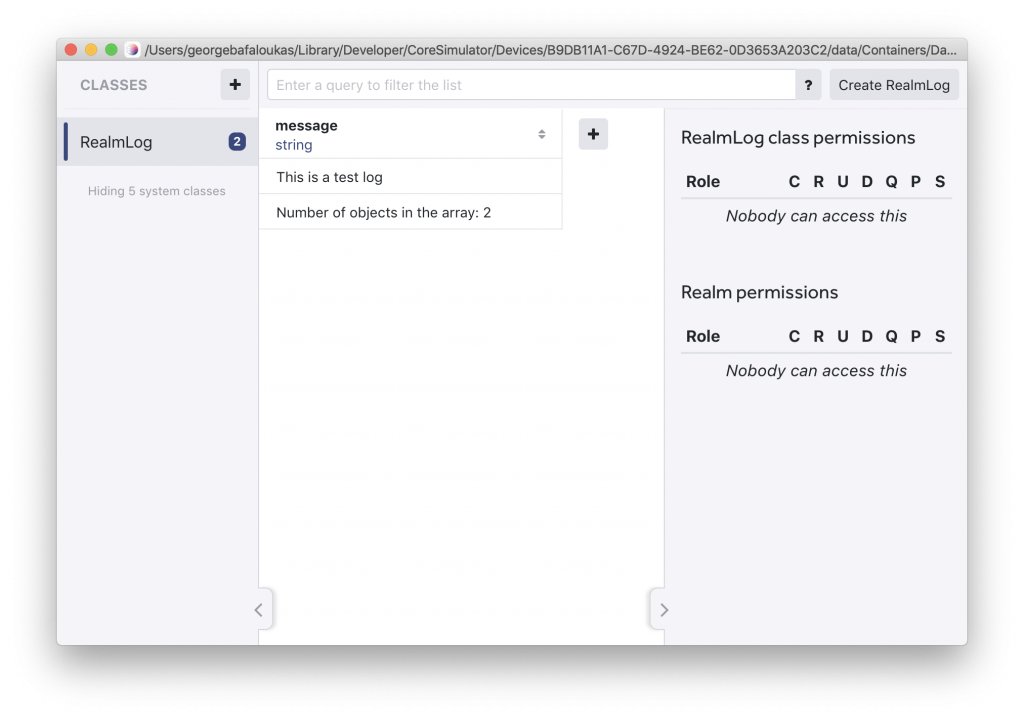
Opening the file in Realm Studio you should see something like the following:

As you can see my file is empty at the moment. After generating some logs, these will be populated in the Realm Studio window as well. Those new entries appear live in the Studio window.
In some cases this would be very useful to debug things happening in your app when a debug session is not running, like Geofence Events or push notifications. In real life scenarios, especially when running on a real device, this is still a pain though. As you would have to download the app container and export the db every time.
Fortunately, there is a way around that! If we take this a step further, we can create a live Realm Studio session for a Realm DB running on a device.
We will do that using the Realm Sync capabilities. We will be using something called the Realm Cloud. This is a cloud service provided by Realm. You can create a 30 day Trial account, or use something called the Realm Object Server in order to create your own self hosted cloud environment. Since both are now Paid services we will opt-in for the Realm Cloud option this time. Sign up for an account here.
Sign up, and then create a new Instance

I named mine RealmLogger and used the Germany server option offered. Make sure you copy the generated URL, we will use it in our app next.
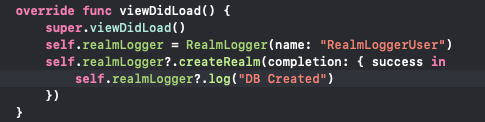
Back to XCode we need to change our Realm set up a bit to support the cloud sync. We will update the RealmLogger.swift file to reflect those changes. The new file will look something like that:
Running the project and calling the new createRealm method when initialising the RealmLogger should start a fully syncable Realm Database. This is how mine looks:
Back to the Realm Cloud dashboard, click the ‘Open in Studio’ button. This will open Realm Studio and point in your Cloud instance. You should see something like that:
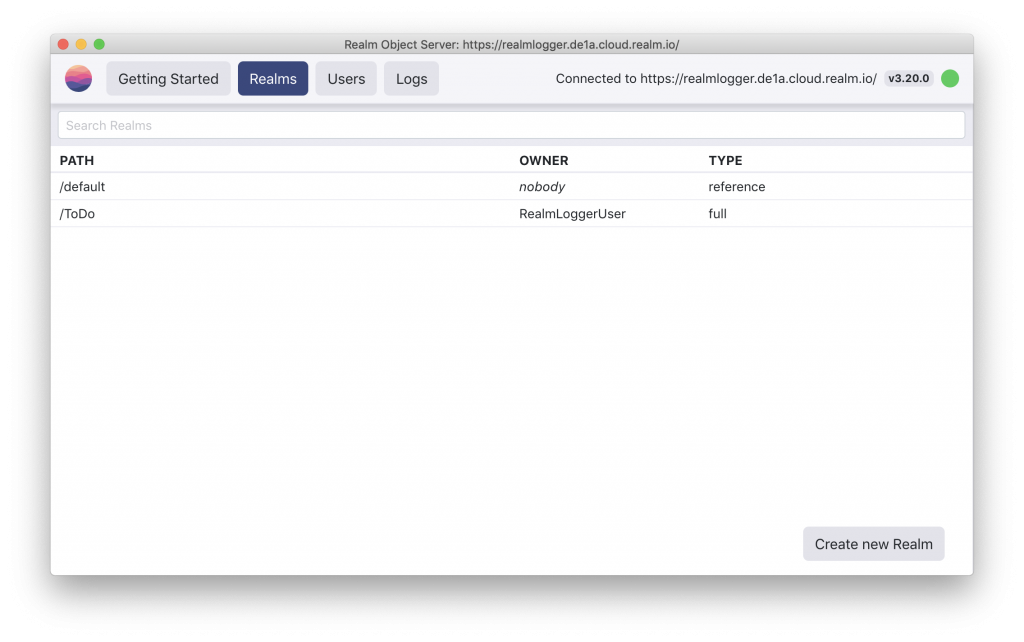
Double clicking the /ToDo Path Realm will open a new browser window with all the saved messages on that Realm. Go back to the Simulator and generate more events. You will see them appearing live on the Cloud instance as well. You can use that for creating an Offline First application or as we initially said for easy debugging app sessions that are hard to run with an attached debugger. See it live in action bellow:
I hope you enjoyed the second part of this tutorial. I can’t wait to see what awesome projects you are going to make using these technologies!